Introduction: Why Uploading Beats to Airbit is Essential
As a music producer, making beats is one of the most rewarding experiences—especially when artists record great vocals over them. However, in order to maximize your reach and sales, you need to make your beats readily available for potential buyers.
Airbit is one of the best platforms for selling beats online, allowing producers to upload, license, and monetize their work efficiently.
In this guide, we’ll walk you through the process of uploading your beats to Airbit, explain key terminology, and share best practices to optimize your beat store.
Understanding Tagged vs. Untagged Beats
What Are Tagged Beats?
Tagged beats have one or more audio watermarks embedded in them, usually a vocal or sound effect that represents the producer. You’ve probably heard famous producer tags like:
- “Murda on the beat, so it’s not nice” (Murda Beatz)
- “We the best music” (DJ Khaled)
- “Deeeeeee Jayyyyyyy Khaled” (DJ Khaled)
Producer tags serve as a form of protection, preventing unauthorized use of your beats. Airbit offers an Autotag feature, which automatically adds a watermark to your beats, ensuring they are protected even when offered as free downloads.
What Are Untagged Beats?
Untagged beats have no vocal tags or watermarks, making them clean versions ready for artists to record over. These are the versions buyers receive when they purchase a license.
Best Practice:
Export both tagged and untagged versions of your beats after mixing and mastering. This way, you won’t need to add or remove tags later when uploading to Airbit.
Setting Up Your Voicetag in Airbit
If you have a custom producer tag that you want to apply to all your beats automatically, Airbit allows you to upload and set it as your default watermark.
Steps to Upload Your Voicetag:
- Go to the Seller Dashboard
- Navigate to Music & Media > Voicetag
- Upload your voicetag file
- Save your settings
Once set up, your voicetag will be applied automatically to every beat you upload.
Uploading Your First Beat to Airbit
Now that you understand tagged vs. untagged beats and have set up your voicetag, it’s time to upload your first beat.
Step-by-Step Guide:
- Log into Your Airbit Account
- Go to the Seller Dashboard
- Navigate to Music & Media > Beats > Upload
- Select your untagged beat file (Airbit will automatically tag it for you)
- Wait for the upload to complete
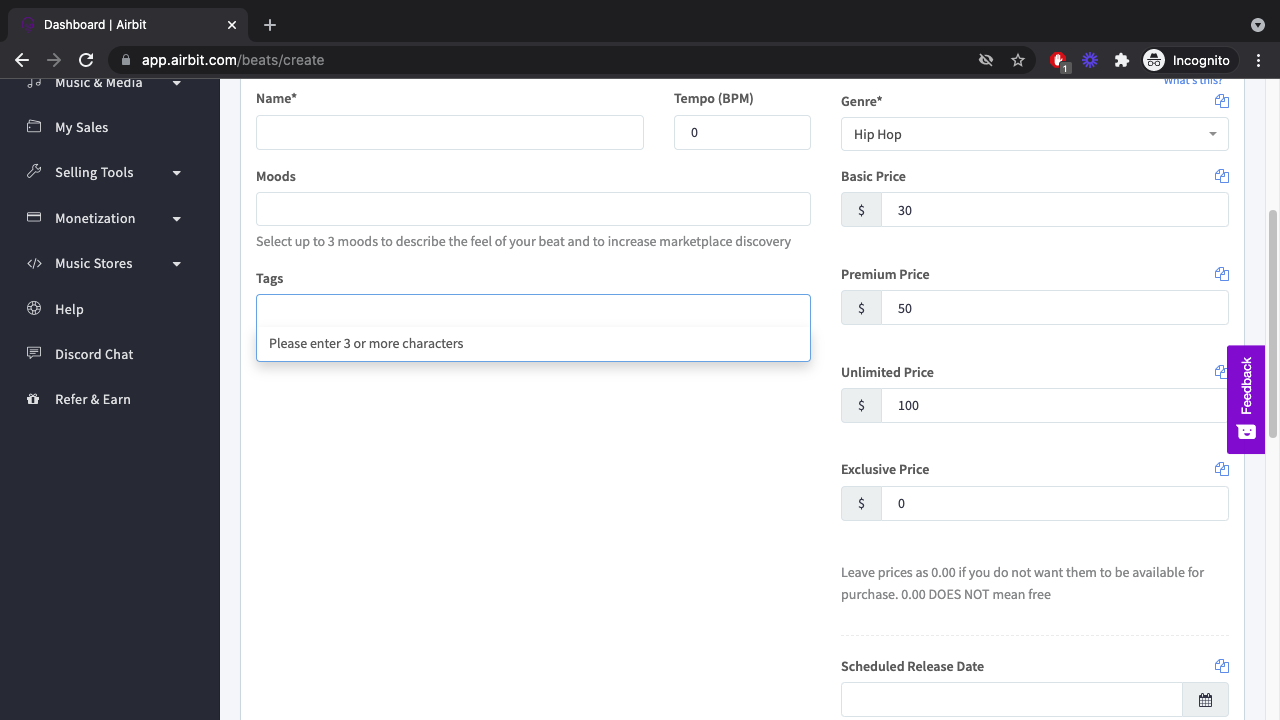
Once uploaded, you’ll be taken to a screen where you can enter details about your beat.
Optimizing Your Beat Listing for Sales
To increase the chances of your beat being discovered and purchased, optimize your listing with the right details.
Key Details to Include:
- Beat Title: Make it descriptive, e.g., “Drake Type Beat with Guitar”
- Tags: Use relevant keywords like *“trap beat,” “R&B instrumental,” or “boom bap beat”
- BPM (Beats Per Minute): Helps artists find beats that match their tempo preference
- Key Signature: Important for artists who want to ensure the beat fits their song
- Genre: Classify your beat correctly (hip-hop, trap, R&B, etc.)
The more details you provide, the easier it will be for potential buyers to find exactly what they’re looking for.
Setting Your Beat Prices & Licenses

Once you’ve optimized your beat listing, it’s time to set your pricing and licensing options.
License Types on Airbit:
- Basic License: Lower-cost option for independent artists
- Premium License: Higher-priced option with more usage rights
- Exclusive License: One-time purchase that grants full ownership
If you’re unsure how to price your beats, Airbit offers a pricing guide to help you determine competitive rates.
How to Set Your Beat Prices:
- On the upload screen, locate the license pricing section
- Set prices for each license type
- Save your settings
Once this step is complete, your beat will be officially available for purchase!
Uploading Trackouts for Your Beat
Trackouts (also known as stems) are individual files of each instrument in your beat. Some buyers, especially professional artists and engineers, prefer purchasing trackouts to have more control over mixing.
How to Upload Trackouts on Airbit:
- Go to Seller Dashboard > Music & Media > Beats
- Select the beat you want to upload trackouts
- Click Upload Trackouts
- Choose and upload your trackout files
- Save your settings
Providing trackouts can help you charge higher prices and appeal to serious buyers.
Next Steps: Growing Your Beat Business on Airbit
Congratulations on uploading your first beat to Airbit! Now that your beat is live, here’s what you can do next:
- Promote Your Beat: Share it on social media and YouTube
- Optimize Your Beat Store: Add a custom logo, bio, and pricing strategy
- Expand Your Catalog: Upload more beats consistently
- Integrate Payment Methods: Ensure smooth transactions for buyers
If you haven’t set up payment integration yet, Airbit offers a help guide to walk you through the process.
Conclusion
Uploading beats to Airbit is an essential step in turning your music production into a profitable business. By understanding tagged vs. untagged beats, optimizing your listings, and setting competitive pricing, you can attract more buyers and grow your revenue.
Now that you know the process, it’s time to take action—upload your beats, promote them, and start making sales!

You must be logged in to post a comment.